


Does a Snagging Inspection Checklist Include Mold Inspection?
A typical snagging inspection checklist focuses on identifying defects in a newly built property.
It usually covers areas such as:
- Structural issues
- Plumbing defects
- Electrical problems
- Doors and windows
- Flooring problems
- Wall and ceiling defects
- Finishing quality
- Fixtures and fittings
Mold inspection may or may not be included depending on the inspection company and package selected.
Many general snagging inspections look for visible indicators of moisture problems, such as:
- Water stains
- Damp patches
- Discoloration
- Peeling paint
- Ceiling marks
- Musty odors
- Signs of leakage
However, a dedicated mold inspection goes further by investigating whether hidden moisture or mold growth exists behind surfaces.
A more detailed mold-focused inspection may include:
- Moisture meter readings
- Thermal imaging
- Inspection around AC systems
- Checking plumbing areas
- Evaluating humidity conditions
- Air quality assessment when necessary
The difference is important because mold often develops as a result of moisture problems that are not immediately visible.
Why Mold Can Appear in New Homes During Snagging
Many buyers assume a newly completed property cannot have mold.

In reality, new buildings can sometimes experience moisture-related issues before handover.
Common causes include:
1. Construction Moisture
During construction, materials such as:
- Concrete
- Plaster
- Drywall
- Wood products
may contain moisture.
If these materials are enclosed before drying properly, moisture can become trapped and create mold-friendly conditions.
2. Waterproofing Problems
Poor waterproofing installation can allow moisture to enter areas such as:
- Bathrooms
- Balconies
- Roof areas
- External walls
- Kitchens
Small waterproofing failures can eventually lead to hidden moisture damage.
3. AC and Condensation Issues
Air conditioning systems are another common source of moisture problems.
Potential issues include:
- Blocked drain lines
- Poor condensate drainage
- Leaking indoor units
- Incorrect installation
These problems can create damp areas where mold may develop.
4. Poor Ventilation
New homes with limited airflow may experience higher indoor humidity.
This can affect areas such as:
- Bathrooms
- Storage rooms
- Closets
- Kitchens
Without proper ventilation, moisture can remain trapped for longer periods.
What Mold Signs Should You Look for During a Snagging Inspection?
Even if a mold inspection is not included, homeowners should pay attention to warning signs during snagging.
Visible Mold Growth
Look for:
- Black spots
- Green or gray patches
- White powdery growth
- Fuzzy areas on surfaces
Common locations include:
- Bathroom ceilings
- AC areas
- Window corners
- Behind cabinets
- Under sinks
Water Stains and Discoloration
Not every stain is mold, but discoloration can indicate previous or ongoing moisture problems.
Check for:
- Yellow or brown ceiling marks
- Dark wall patches
- Uneven paint color
- Damp-looking surfaces
Musty Odors
A persistent musty smell can indicate:
- Hidden moisture
- Mold growth
- Damp materials
Pay attention to odors in:
- Closed rooms
- Storage spaces
- Wardrobes
- Bathrooms
Damaged Finishes
Moisture problems may appear as:
- Bubbling paint
- Peeling wallpaper
- Swollen flooring
- Cracked plaster
These signs should be investigated before accepting the property.
What to Do If Your Snagging Report Finds Mold Signs
Finding mold signs during snagging does not automatically mean the property has severe contamination. However, it should be treated seriously because mold usually indicates a moisture problem.
Follow these steps.
1. Document Everything Immediately
Take clear records of:
- Mold locations
- Photos and videos
- Visible stains
- Odors
- Moisture readings if available
- Inspection findings
Documentation is important when communicating with:
- Developers
- Contractors
- Property management
- Warranty teams
Do not remove mold before documenting the condition because it may remove important evidence.
2. Identify the Source of Moisture
The key question is:
Why did mold appear?
Possible causes include:
- Plumbing leaks
- Waterproofing failure
- AC condensation problems
- Construction moisture
- Poor ventilation
Cleaning the mold without fixing the moisture source often leads to recurrence.
3. Request Proper Rectification From the Developer
If the property is still under warranty or handover stage, report the issue clearly.
Ask the developer or contractor to address:
- The moisture source
- Damaged materials
- Mold contamination
- Necessary repairs
A proper solution should not only repaint the affected area.
Painting over mold without fixing the cause may only hide the problem temporarily.
4. Consider a Professional Mold Assessment
If the mold signs are significant, recurring, or located in hidden areas, a specialized mold assessment may be useful.
Professional evaluation can help determine:
- How extensive the problem is
- Whether hidden areas are affected
- What materials need treatment or replacement
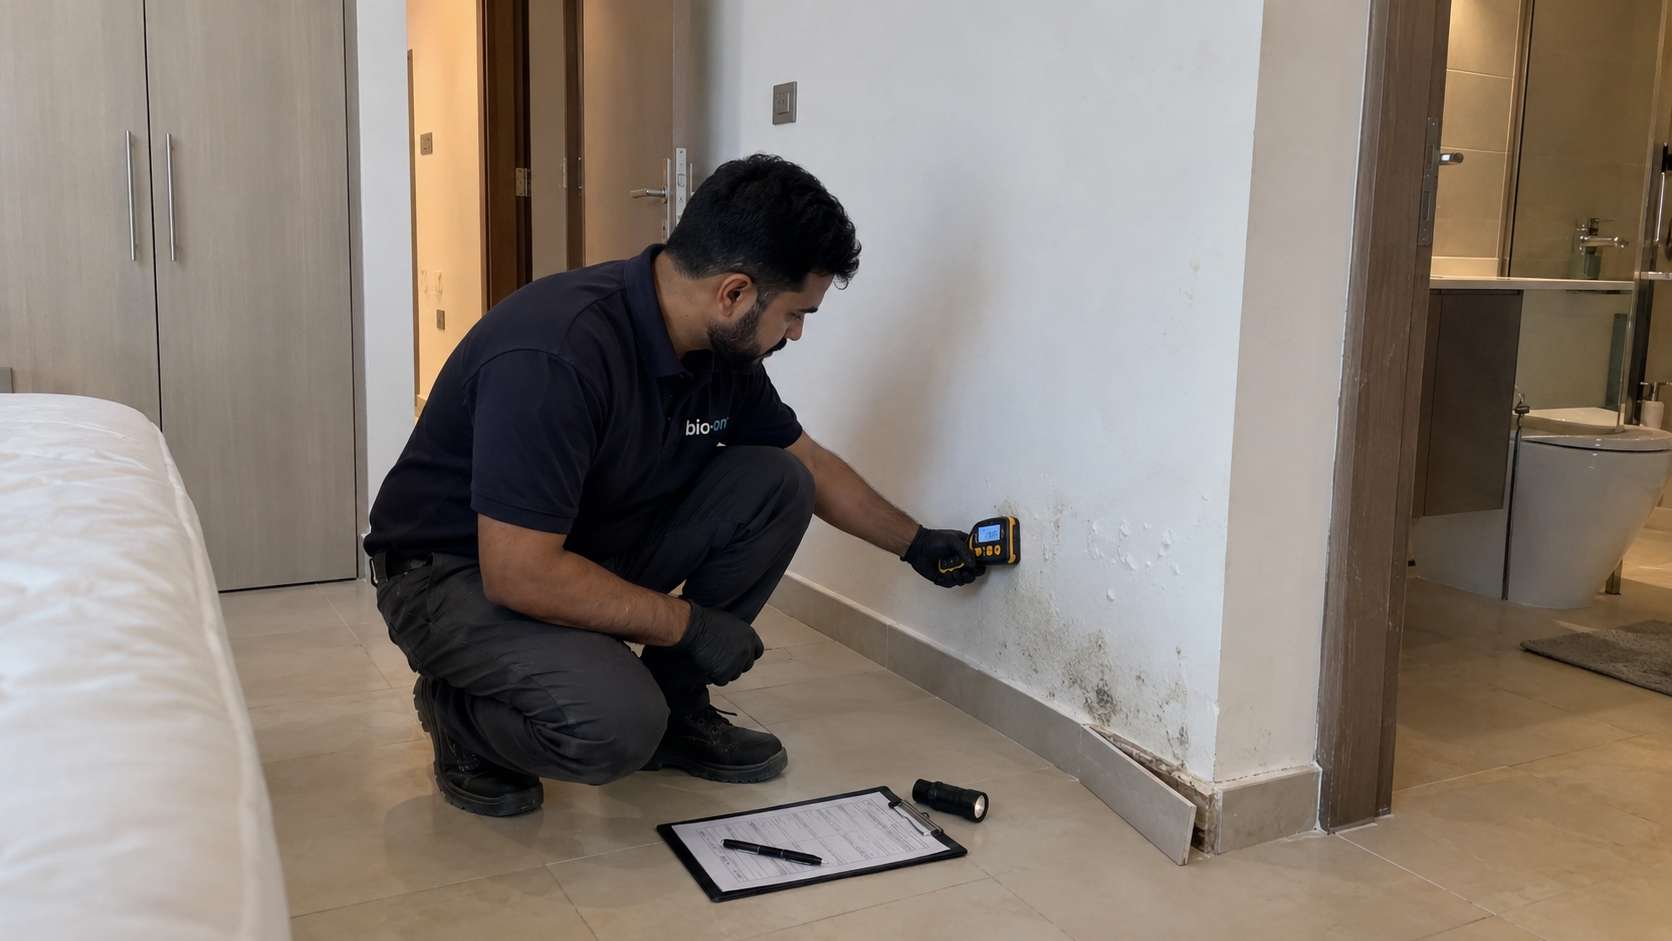
This is especially important when mold is found near:
- HVAC systems
- Bedrooms
- Large wall areas
- Ceiling cavities
5. Complete Proper Mold Remediation Before Moving In
If mold is confirmed, remediation should address both:
- The existing mold contamination
- The moisture condition that caused it
A professional remediation process may include:
- Containment of affected areas
- Removal of damaged materials
- HEPA air filtration
- Surface cleaning
- Drying and moisture control
- Final inspection
The goal is to restore the property rather than simply improve its appearance.
Should You Reject a Property Because of Mold Found During Snagging?
Not every mold finding means you should immediately reject a property.
The decision depends on:
- The severity of the issue
- The cause of the moisture
- Whether repairs are possible
- The developer’s response
- Whether proper remediation is completed
A small surface issue caused by a correctable problem is different from extensive hidden mold caused by major waterproofing or structural failures.
The important point is ensuring the problem is properly investigated and resolved before acceptance.
How to Add Mold Checks to Your Snagging Checklist
If mold prevention is a priority, add these specific checks:
Moisture and Water Checks
- Check walls for dampness
- Inspect ceilings for stains
- Check under sinks and plumbing areas
- Look around AC units
- Inspect bathrooms and wet areas
Air and Ventilation Checks
- Test bathroom exhaust fans
- Check airflow
- Look for condensation problems
- Inspect AC drainage
Mold Risk Areas
Pay extra attention to:
- Bathrooms
- Kitchens
- Laundry areas
- Storage rooms
- Balconies
- AC closets
Documentation
Record:
- Photos
- Videos
- Inspection notes
- Repair requests
A detailed record makes it easier to ensure problems are properly addressed.
The Bottom Line: Protecting Your Home Before Handover
A snagging inspection for mold can identify visible warning signs such as stains, dampness, leaks, and moisture-related defects, but a full mold assessment may require additional inspection methods.
If mold signs appear in your snagging report, do not treat them as a cosmetic issue. Mold is usually a symptom of excess moisture, and the real solution is finding and correcting the source.
Before accepting your property, make sure moisture problems are repaired, affected areas are properly remediated, and the home is dry enough to prevent mold from returning. A thorough snagging process can save homeowners from expensive repairs after moving in.