


1. Start Mold Prevention After Water Leak by Stopping the Source
The first step in mold prevention after water leak is stopping the water source. You cannot prevent mold if water is still entering the wall, floor, cabinet, ceiling, or AC area.
Start by finding where the water came from. Common sources include a burst pipe, slow pipe leak, washing machine hose, dishwasher line, water heater valve, toilet supply line, roof seepage, balcony leak, bathroom waterproofing failure, or blocked AC condensate drain.
Once you find the source, shut off the closest valve. If you cannot locate it quickly, turn off the main water supply. If water is near electrical outlets, appliances, or wet wiring, avoid stepping into the area and get help safely. Water and electricity are not a DIY guessing game.
After the leak is stopped, take photos and videos. This helps with your landlord, building management, plumber, insurance provider, or restoration company. Then move dry items away from the affected area so water does not spread further.
The reason this step matters is simple: mold grows because moisture stays. Cleaning the surface while the source is still leaking only delays the real problem.
Also, do not ignore “small” leaks. A slow drip inside a closed kitchen cabinet can be worse than a visible puddle because it may keep MDF, wood, drywall, and stored items damp for days. Mold often starts in those quiet, hidden spaces.
2. Remove Standing Water in the First Few Hours
After the water source is controlled, remove standing water as fast as possible. The first few hours are important because water travels quickly into gaps, cracks, porous materials, and hidden layers.
For a small clean-water leak, towels, mops, buckets, and absorbent cloths may be enough. For a larger leak, use a wet-dry vacuum if available. A wet-dry vacuum is better than mopping because it extracts water instead of just moving it around.
Focus on places where water hides:
- Under kitchen cabinets
- Under bathroom vanity units
- Behind washing machines
- Around water heaters
- Under rugs and carpets
- Along skirting boards
- Under appliances
- Near AC indoor units
- Around door thresholds
- Inside storage rooms
Do not push water into dry rooms. Work from the outer edge of the wet area toward the deepest wet spot. If the water came from a clean pipe, the cleanup is usually easier. If the water came from sewage, toilet overflow, floodwater, or a dirty drain, treat it as contaminated and call a professional.
At this stage, the goal is not perfection. The goal is to remove as much liquid water as possible before it soaks deeper. Every hour matters because soaked materials take longer to dry than wet surfaces.
Once the visible water is gone, do not stop. The floor may look dry while moisture remains under cabinets, behind walls, or below flooring. That hidden moisture is where mold prevention becomes serious.
3. Open the Area So Hidden Moisture Can Escape
The next step is to expose hidden wet areas. Mold prevention after water leak fails when homeowners dry only what they can see.
Open cabinet doors, drawers, wardrobes, bathroom vanities, and storage compartments near the leak. Remove items stored under sinks or around wet areas. Lift rugs and mats. Move furniture away from walls. Pull appliances forward if it is safe to do so.
Water loves tight spaces. It can sit behind skirting boards, below vinyl flooring, inside carpet padding, behind kitchen kickboards, under laminate planks, and inside MDF cabinet bases. These areas dry slowly because air cannot reach them.
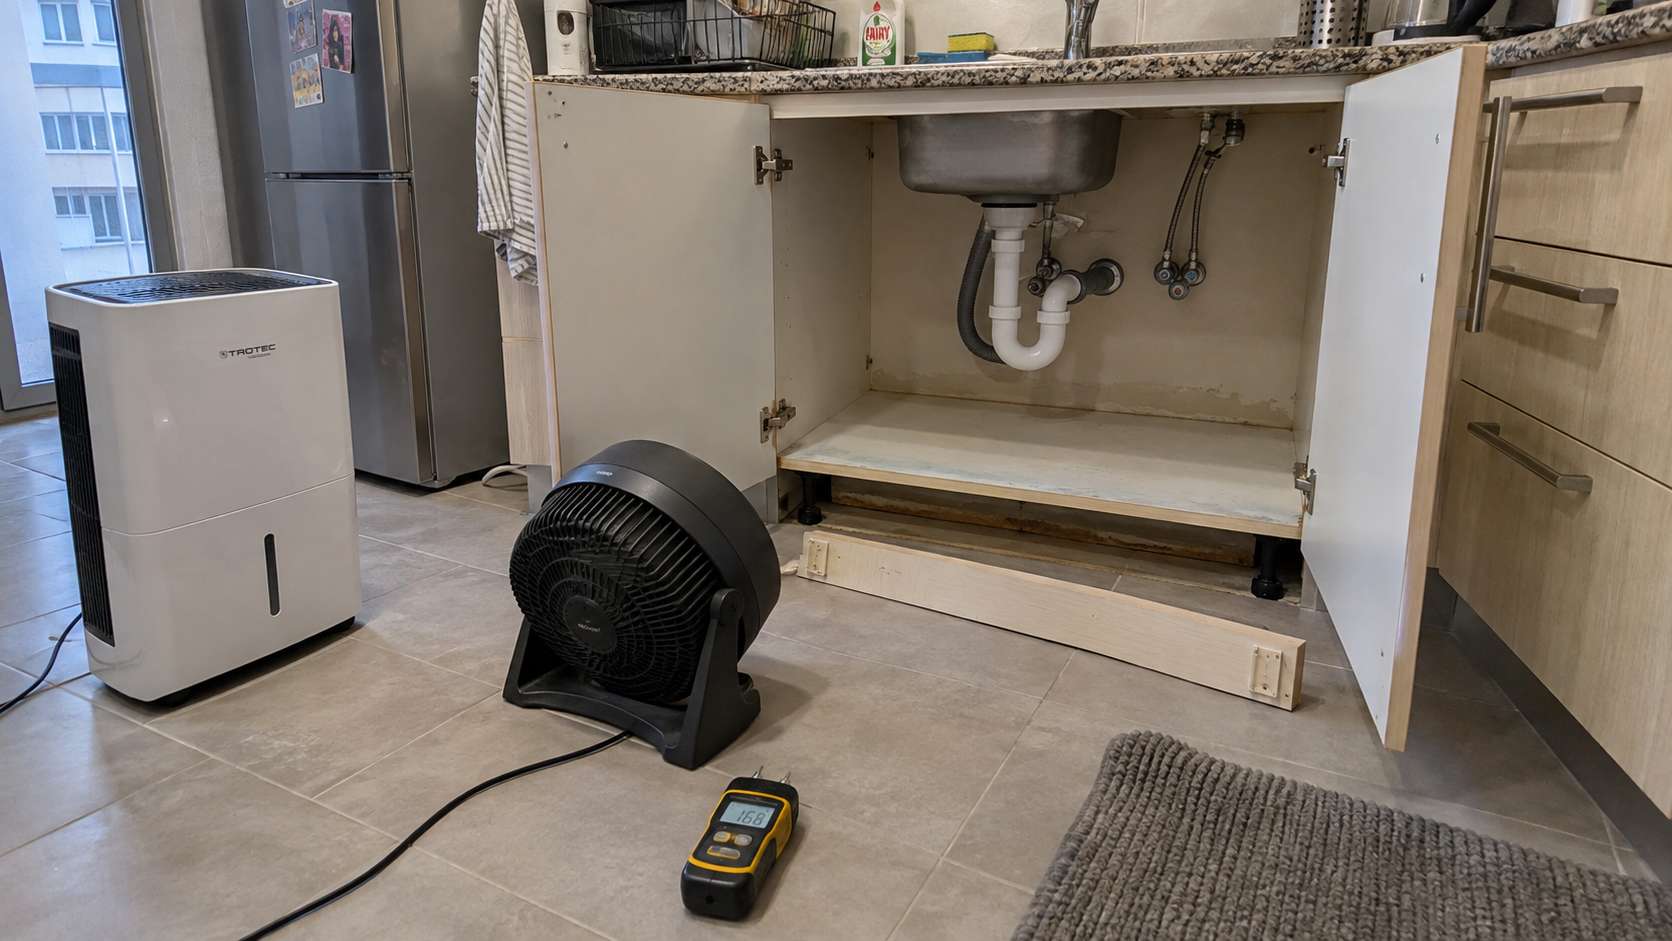
Check for signs of trapped moisture:
- Swollen cabinet boards
- Soft skirting boards
- Bubbling paint
- Peeling wallpaper
- Cold wall patches
- Musty smell
- Dark stains
- Loose flooring
- Damp grout lines
- Warped wood
- Sagging gypsum board
In UAE homes, pay extra attention to AC-related areas, closed kitchens, bathroom vanities, and built-in wardrobes. These spaces often have limited airflow. If they get wet, they can stay humid even when the room itself feels normal.
Do not close everything back too soon. Keep the affected area exposed during drying. A closed cabinet after a leak is like a small mold incubator: dark, damp, and poorly ventilated.

Professional-style cleanup is not just about drying the floor. It is about opening the wet structure so moisture has a way out.
4. Use Fans, AC, and Dehumidifiers Correctly
Active drying is the heart of mold prevention after water leak. You want to dry wet materials within 24–48 hours if possible, and passive drying is often too slow.
Use fans to move air across damp surfaces. Aim them toward wet walls, floors, cabinet bases, corners, and under-cabinet areas. Do not just point a fan randomly into the room. Air should flow across the wet surface and carry moisture away.
Use a dehumidifier to pull moisture out of the air. This is especially useful in humid climates, closed apartments, villas, bathrooms, laundry rooms, and rooms with poor ventilation. A dehumidifier helps wet materials release moisture faster because the air around them is drier.
Your AC can also help control humidity, but do not rely on AC alone. If the leak is from an AC drain line or indoor unit, fix that issue before running the system for long periods. A working AC can support drying. A leaking AC can restart the problem.
For better drying:
- Keep wet areas open.
- Run fans continuously during the early drying stage.
- Use a dehumidifier if the room feels humid.
- Empty the dehumidifier tank regularly.
- Keep windows closed if outdoor humidity is high.
- Keep interior doors open for airflow when useful.
- Continue drying after the surface looks dry.
The CDC also advises drying the home and everything in it as quickly as possible, within 24–48 hours if you can. That is your practical target.
If the area still smells musty, feels damp, or shows swelling after a day or two, assume moisture is still present.
5. Clean Hard Surfaces, but Do Not Trust Spray Alone
Cleaning is important, but it is not a substitute for drying. Mold prevention after water leak depends more on moisture removal than on spraying disinfectant everywhere.
Once standing water is removed and drying is underway, clean hard, non-porous surfaces. This includes tile, sealed countertops, metal, glass, plastic, and sealed floors. Use soap and water or a suitable household cleaner to remove dirt, dust, and residue. Mold can feed on organic material, so cleaning grime matters.
Focus on edges and hidden contact points:
- Floor-wall joints
- Cabinet bottoms
- Appliance feet
- Pipe entry points
- Sink cabinet corners
- Toilet base edges
- Shower corners
- Skirting board edges
- Tile grout lines
After cleaning, dry the area again. Do not leave cleaner, rinse water, or wet cloth residue sitting on the surface.
Be careful with bleach. Bleach may help on some hard, non-porous surfaces when used correctly, but it does not solve wet drywall, soaked carpet padding, swollen MDF, or moisture inside walls. Also, never mix bleach with ammonia, vinegar, or other cleaning products.
Wear gloves while cleaning. If there is visible mold, sewage water, a strong musty odor, or respiratory sensitivity in the home, use better protection and consider professional help. The CDC recommends protective equipment such as gloves, mask, and goggles when cleaning mold.
The rule is simple: remove water first, dry the material, clean the surface, then dry again.
6. Remove Wet Materials That Cannot Dry in Time
Some materials are difficult or impossible to dry properly after a water leak. If they stay wet for too long, removing them may be the safest choice for mold prevention.
This is especially true for porous or absorbent materials. Drywall, carpet padding, insulation, MDF, particle board, fabric storage boxes, and some flooring layers can hold water inside. The surface may look fine while the inside remains damp.
Watch these materials carefully:
- Carpet padding
- Wet rugs
- MDF cabinet bases
- Particle board furniture
- Gypsum board
- Insulation
- Wallpaper
- Fabric items
- Mattresses
- Laminate flooring
- Skirting boards
- Ceiling tiles
The EPA notes that if there has been a lot of water damage or mold growth covers more than 10 square feet, its larger remediation guidance may be needed. In plain language, if the leak is large, hidden, or already moldy, do not treat it like a simple mop job.
Ask this question for every wet material: Can it dry completely within 24–48 hours?
If the answer is no, you may need removal, replacement, or professional drying. For example, a tile floor may dry well, but the cabinet base beside it may not. A rug may be washable, but the padding underneath may trap moisture. A painted wall may look okay, but the drywall paper behind it may stay wet.
Removing damaged material early can feel expensive, but it is often cheaper than dealing with mold, odor, and structural repairs later.
7. Recheck the Area at 24 Hours and 48 Hours
The final step is inspection. Do not assume the job is done just because the puddle is gone. Recheck the area at 24 hours and again at 48 hours.
Use your eyes, nose, and hands. Look for stains, swelling, soft wood, bubbling paint, peeling edges, damp corners, or moisture marks. Smell the area. A musty smell is a warning sign that moisture may still be trapped somewhere.
Touch nearby walls, cabinet bases, skirting boards, and flooring edges. Compare the affected area with a dry area in another room. If one patch feels colder, softer, or more humid, it may still be damp.
Also check the leak repair. Place a dry tissue or paper towel under the pipe, hose, valve, drain, or suspected leak point. Leave it for a while. If it becomes wet, the leak is still active.
Call a professional if:
- The area is still damp after 48 hours.
- The musty smell remains.
- Mold is already visible.
- Water reached drywall, ceiling, insulation, or cabinets.
- The leak involved sewage or dirty water.
- Water reached electrical areas.
- The source cannot be found.
- The same area keeps getting wet.
- Someone in the home has asthma, allergies, or breathing problems.
After everything is dry, consider adding leak detectors under sinks, near washing machines, beside water heaters, and close to AC drain points. They cannot stop every leak, but they can warn you early next time.
The Bottom Line
Mold prevention after water leak is all about the first 48 hours. Stop the source, remove standing water, expose hidden damp areas, use fans and dehumidifiers, clean hard surfaces, remove materials that cannot dry, and inspect again at 24 and 48 hours.
The biggest mistake is trusting appearances. A dry-looking floor does not mean dry cabinets, walls, carpet padding, or flooring layers. Mold usually grows where moisture stays hidden.
If you dry everything quickly and completely, mold is much less likely to grow. If materials stay wet beyond 48 hours, smell musty, swell, stain, or soften, treat the situation seriously and get professional help before a small leak becomes a bigger mold problem.