


The 1-Hour AC Mold Cleaning Checklist (What You Need)
Before you clean AC mold, prepare everything first. The one-hour method only works if you do not waste time looking for tools halfway through the job.
You need basic protective gear, gentle cleaning supplies, and enough airflow to dry the parts properly. Do not start by spraying random harsh chemicals into the AC. That can spread chemical odor through your room and may damage delicate components.
Here is what you need:
| Item | Why You Need It |
|---|---|
| Gloves | Protects your hands from mold, dust, and cleaning solution |
| Mask | Reduces breathing in disturbed dust or particles |
| Safety glasses | Protects your eyes during wiping and rinsing |
| Microfiber cloths | Good for wiping casing, vents, and reachable surfaces |
| Soft brush | Helps remove dust from filters and vent covers |
| Bucket or basin | For washing removable filters |
| Mild dish soap | Safer first cleaner for washable parts |
| White vinegar | Useful for light surface odor and stains on removable parts |
| Spray bottle | Only for controlled spraying on removable parts, not deep inside the AC |
| Towels | For drying parts before reassembly |
| Screwdriver | Only if your unit cover or filter access requires it |
| Vacuum with brush attachment | Helps remove loose dust before wet cleaning |
The most important item is patience. If you rush the drying stage, you may put damp parts back into the AC. That can make the mold problem return faster.
Also, know your limit. You should only clean parts you can access safely. If you need to open electrical sections, remove deep internal components, or touch wiring, stop. That is no longer basic home cleaning.
Step-by-Step: How to Clean AC Mold in Under an Hour
To clean AC mold in under an hour, focus on reachable, washable, and removable parts. This includes filters, front casing, vent louvers, and light surface stains. Do not force the process into areas you cannot safely access.
This guide works best for mild mold stains around a split AC indoor unit or visible vent area. If the mold is heavy, smells strong, or appears inside the duct, do not rely on this method alone.
Step 1: Safe Shutdown and Disassembly (5 Minutes)
Turn off the AC completely before touching anything. If possible, switch it off from the breaker or main power source. This step matters because you are working near electrical parts, moisture, and dust.
Open the front panel gently. Remove the filters carefully so dust and mold particles do not shake everywhere. If your AC has removable vent covers or louvers that are easy to detach, remove them too. Do not force anything.
Place the removable parts on a towel or washable surface.
Before you continue, inspect the unit quickly. Look for:
- Black or green stains on filters
- Musty smell from the unit
- Wet areas inside the casing
- Water dripping marks
- Slimy drain area
- Mold near the blower area
- Mold returning around the same vent
If you see heavy internal mold, wet insulation, or dripping water, your one-hour cleaning should stop here.

That is a sign the problem may need AC servicing or mold remediation, not just surface cleaning.
Step 2: Wash and Sanitize the Filters (15 Minutes)
Wash the filters first because dirty filters are one of the easiest ways mold and dust collect inside an AC. Filters trap dust, and dust can become a food source for mold when moisture is present.
Rinse the filters under clean water. Use mild dish soap and a soft brush to remove dirt. Do not scrub too hard because some filters are delicate and can tear.
For light musty odor, you can wipe or rinse the filter with a diluted white vinegar solution. Keep it simple. Do not mix vinegar with bleach or other cleaners.
After washing, rinse the filters again with clean water.
Then dry them properly. This is the part many people skip. Filters should not go back into the AC while damp. Shake off extra water, wipe with a towel, and leave them in a ventilated area while you clean the rest of the unit.
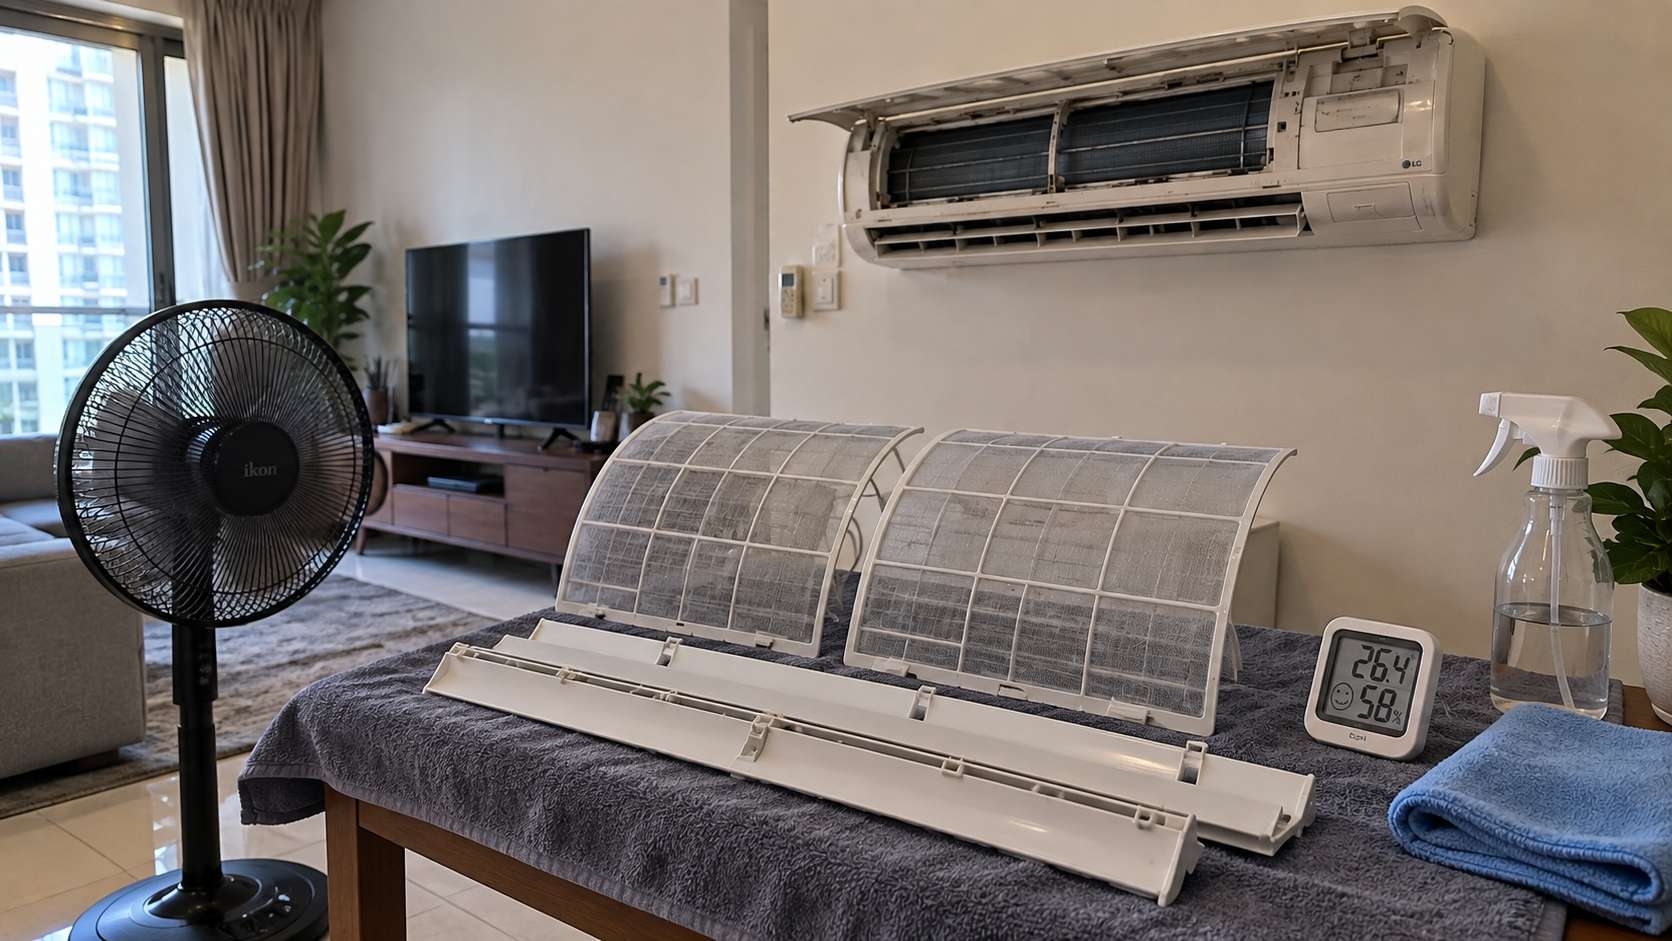
Never put wet filters back and turn on the AC immediately. That can create a damp airflow path and may help mold return.
Step 3: Deep Clean the Coils and Blower Wheel (25 Minutes)
This step needs caution. For a basic home clean, you are not doing a full technical AC deep clean. You are cleaning only the reachable dust and light stains around the coil face, blower opening, and casing area without touching wiring or forcing tools deep inside.
First, use a vacuum with a soft brush attachment to remove loose dust around the accessible intake area. Work gently. Do not push dust deeper into the unit.
Next, wipe reachable non-electrical surfaces with a damp microfiber cloth. Use mild dish soap and water for general cleaning. For light mold staining on accessible plastic surfaces, use a cloth slightly dampened with white vinegar.
Do not flood the unit with water. Do not spray liquid deep into the AC. Do not soak the coils unless you know exactly what you are doing and the unit is designed for that kind of cleaning.
For the coil area, wipe only what is safely reachable. AC coils are delicate. Bending fins, damaging sensors, or wetting electrical parts can create a bigger problem than the mold stain.
For the blower wheel, clean only the reachable edge or visible surface. If the blower wheel is coated with black buildup, smells musty, or has mold deep between the fins, call an AC technician or mold specialist. Blower wheels often need proper disassembly and controlled cleaning.
Warning signs you should stop DIY cleaning:
- Strong musty smell from deep inside the unit
- Black buildup across the blower wheel
- Mold behind the coil
- Wet or slimy internal parts
- Water leakage
- Electrical components near the cleaning area
- Mold returning soon after previous cleaning
A proper internal AC cleaning can take longer than one hour. If someone tells you deep internal mold can be safely fixed with a five-minute spray, be careful.
Step 4: Wipe Down the Casing and Reassemble (15 Minutes)
Now clean the outer casing, front panel, louvers, and surrounding wall area. These parts often collect dust and condensation, especially in humid homes.
Use a microfiber cloth with mild soap water. Wipe the plastic casing, vent direction blades, and outer frame. If there are small mold stains, use a controlled vinegar wipe on the affected hard surface.
Do not spray cleaner directly into the vent opening. Spray onto the cloth instead. This gives you better control and avoids pushing liquid into the system.
Dry every cleaned part with a clean towel. Check the filters again. They should be fully dry before reinstallation. If they are still damp, wait longer. The one-hour target is not worth creating another mold problem.
Once everything is dry, reinstall the filters and covers. Close the panel properly.
Turn the AC back on and monitor the first few minutes. Pay attention to smell, noise, dripping, or unusual airflow. A mild clean smell may be normal, but a strong musty odor means the mold may be deeper inside the system.
Crucial Safety Precautions You Cannot Skip
You cannot skip safety when cleaning AC mold because AC systems involve airflow, electricity, moisture, and possible contamination. A careless cleaning attempt can spread mold particles, damage the unit, or make indoor air feel worse.
Start with protection. Wear gloves, a mask, and eye protection. Even small mold cleanup can disturb dust and particles. Avoid dry brushing moldy areas because that can release more particles into the air.
Never mix cleaning products. Do not mix bleach with vinegar. Do not mix bleach with ammonia. Do not mix random mold sprays with kitchen cleaners. Strong chemical reactions can create dangerous fumes.
You should also avoid harsh chemical mold sprays inside the AC. They may smell strong, but that does not mean they are the right solution. Spraying harsh chemicals into airflow areas can leave residue, spread fumes, and irritate indoor air.
Do not clean while the AC is powered. Always shut it down first.
Do not touch:
- Wiring
- Circuit boards
- Sensors
- Electrical connectors
- Deep internal parts
- Motor components
- Sealed AC sections
Do not use high-pressure water unless you are trained and the system is prepared for professional cleaning. Water can reach electrical parts or push dirt deeper inside.
Also, do not run the AC if you suspect serious mold contamination inside the system. If every time the AC starts the room smells musty, the mold may not be limited to the filter or casing.
Call a professional if:
- Mold is inside ducts
- Mold covers the blower wheel
- Mold returns after cleaning
- The AC leaks water
- The wall or ceiling around the AC is damp
- Someone in the home has asthma or serious allergies
- The smell continues after filter cleaning
- The mold area is large or spreading
DIY is for light surface cleaning. Deep AC mold needs proper inspection.
Final Takeaway: The 5-Minute Trick Is a Scam
The five-minute AC mold-cleaning trick is usually a scam because mold is rarely solved by one quick spray. A spray may hide the smell or bleach the stain, but it does not fix dirty filters, clogged drains, condensation, high humidity, hidden leaks, or mold deep inside the blower and coils.
A one-hour cleaning can be useful when the mold is light and reachable. You can safely wash filters, wipe the casing, clean vent covers, remove surface dust, and reduce visible stains. That is worth doing.
But long-lasting results need more than speed. You need to dry parts fully, improve airflow, clean filters regularly, check AC drainage, control humidity, and investigate recurring mold.
If the mold keeps coming back, smells musty, or appears deep inside the AC, stop repeating quick tricks. Take the time to fix the root cause. That is how you protect your AC, your indoor air, and your home from becoming a repeat mold problem.