


Roof leaks in the UAE rarely give you a polite warning. One day everything looks fine; the next, you notice a damp patch on the ceiling, a peeling paint bubble, or water dripping during a sudden winter rain. Between intense heat, thermal expansion, rooftop AC units, and occasional heavy downpours, roofs here take a beating. If you’re dealing with a leaking roof right now—or want to prevent one—this guide walks you through clear, practical steps: what to do first, why leaks happen, how repairs are done, typical costs, and when to call professionals.
1) First Aid: What to Do the Moment You Spot a Leak
Act fast and keep it simple. Your first goal is to protect people, electrics, and valuables—then contain the water.
Keep everyone safe. If water is near lights or sockets, switch off the power to that room at the breaker. Don’t stand on wet floors while touching electrical fixtures.
Relieve ceiling bulges. If paint is ballooning, water is pooling above. Place a bucket, put on eye protection, and make a small hole at the lowest point to drain it in a controlled way. This can prevent a sudden ceiling collapse—but only do this if the area is safe and you’re confident. If not, leave it to pros.
Protect the space. Move furniture, roll up rugs, and cover what you can’t move with plastic sheets. Put buckets/towels where drips land. Photograph the damage for your landlord or insurance.
Do not climb the roof in the rain. Wet, dusty roofs are slippery. Wait for dry conditions and proper safety equipment.
2) Why Roofs Leak in the UAE (and Where to Look)
Understanding local causes helps you fix the right problem—not just the symptom.
Heat and thermal cycling. Our roofs expand all day under the sun and contract at night. Over time, this movement cracks screed, opens joints, and weakens waterproofing membranes.
Ageing or failed waterproofing. Torch-on bitumen, liquid PU, acrylic, PVC/TPO sheets—every system has a lifespan. UV exposure, ponding water, and foot traffic from maintenance crews accelerate wear. Seams split, blisters form, and pinholes appear.
Blocked roof drains and scuppers. Sand, leaves, and construction debris clog outlets. Water ponds, finds the weakest point, and seeps down. After sandstorms, drains can clog in days.
Penetrations are prime suspects. AC stands and condensate lines, solar panel mounts, satellite bases, skylights, and parapet flashings are leak hot-spots. If the sealant around a pipe boot or metal flashing dries and cracks, water gets in.
Cracked parapet caps and coping joints. Hairline gaps along parapet tops or tile caps channel water into walls, then into ceilings at the perimeter—often far from the visible drip.
Tiles and metal roofs (villas/warehouses). Slipped/broken tiles, missing ridge mortar, corroded screws, and failing underlayment let wind-driven rain travel under the surface.
3) How Pros Diagnose and Repair a Leaking Roof

Good repairs start with good diagnosis. Here’s the typical process we follow so you know what to expect.
Inspection & leak tracing
We check the ceiling pattern indoors (stains, lines, bulges), then trace upward outside, focusing on penetrations, joints, and drainage paths. On flat roofs, we look for ponding rings, blisters, cracked screed, lifted seams, and brittle sealants. Where needed, we use moisture meters, dye tests, or controlled water testing to confirm the source.
Temporary make-safe (if rain is imminent)
Before a storm, fast interventions prevent escalation: reseal critical points with roof-grade sealant, lay emergency membrane patches, raise temporary barriers around drains, and redirect AC condensate to proper outlets. These buys time for a permanent fix in dry conditions.
Permanent repairs (match the system to the problem)
- Membrane patching & seam repair (bitumen/PVC/TPO). Clean, dry, prime. Torch or hot-air weld compatible patches with rounded corners; roll firmly to eliminate fishmouths. For sheet systems, reinstate manufacturer-grade overlaps.
- Liquid waterproofing (PU/Acrylic/Hybrid). After surface prep, apply base and top coats at the specified thickness, reinforcing cracks and corners with fabric. Great for detailing around vents and complex geometry.
- Flashing & penetration rebuild. Replace perished pipe boots, add new metal flashings with proper laps, re-bed/re-point tile flashings, and seal with UV-stable mastics (not generic silicone).
- Crack repair in screed/concrete. Open the crack, dry, prime, and fill with flexible sealant or elastomeric mortar. For structural cracks, an engineer may specify epoxy injection and movement joints.
- Drainage restoration. Clear and enlarge outlets if undersized; add auxiliary scuppers or emergency overflows; re-slope ponding areas with repair screed where feasible.
- Tile/metal roof fixes. Replace broken tiles, re-secure ridges, add under-tile flashings, swap corroded screws with neoprene washers, fit eave closures, and reinstate underlayment where compromised.
Dry-out & interior recovery
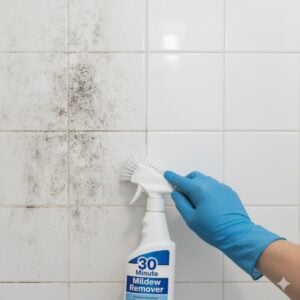
Once the roof is watertight, ceilings and cavities need drying to prevent mold. We open small vents, run air movers/dehumidifiers, and treat stained areas. If mold is present, we follow safe remediation protocols before repainting.
4) Typical Costs in the UAE (and What Changes the Price)
Every roof is different, but these ranges help you plan. Final figures depend on access, height, materials, severity, and warranty terms.
| Service | Typical Range (AED) | Notes |
|---|---|---|
| Leak assessment & tracing | 250 – 600 | Often credited against repair if you proceed |
| Emergency make-safe (small area) | 300 – 900 | Temporary patches, sealant, drain clearing |
| Local membrane patch (per point) | 350 – 1,200 | Depends on system and prep required |
| Liquid waterproofing recoat (per sq.m.) | 25 – 60 | Spec & thickness matter; includes primer/reinforcement zones |
| Full waterproofing replacement (per sq.m.) | 35 – 120 | Material (bitumen/PVC/TPO/PU), insulation, access, warranty |
| Tile/metal roof repairs (minor) | 400 – 1,500 | Per area; parts & safe access extra |
| Interior drying & mold treatment | Varies by area | Prevents odors and health risks |
What increases cost? Hidden leaks that require opening finishes, multiple failed details, high parapets/limited access, and warranty-grade specifications. What reduces cost? Early action, clear access, and addressing drainage/clogging before the membrane is compromised.
5) DIY vs Professional: Clear Rules So You Don’t Make It Worse
Good DIY: Contain inside water, clear roof drains (when dry and safe), re-route AC condensate into proper drains, and apply a small temporary seal to a clearly obvious gap on a non-warranty roof surface. Keep receipts and photos.
Stop sign DIY: Torch work, hot-air welding, cutting membranes, working at height without safety gear, or painting liquid membranes over wet substrates. These can trap moisture, void warranties, and create serious hazards.
When to call us: Repeated leaks, leaks appearing far from the suspected source, ponding areas, brittle or blistered membranes, penetrations around AC/solar, or any signs of ceiling sag/mold. We’ll isolate the cause, make it safe, and propose a repair that lasts.
6) Preventive Maintenance: The Best “Repair” Is the One You Never Need
A few routines dramatically reduce leak risk—especially before the short UAE rainy season.
- Quarterly drain and roof sweep. Clear sand/leaves, especially around outlets and parapet scuppers. Confirm grates are secure.
- Annual detail check. Inspect seams, flashings, pipe boots, and sealants; refresh UV-exposed mastics before they crack.
- AC discipline. Ensure condensate drains discharge to proper outlets—not onto the roof surface. Service units so pans don’t overflow.
- Control foot traffic. Use stepping tiles or pavers along service routes so technicians don’t damage membranes.
- Know the age of your system. Plan for refurbishment before end-of-life rather than after the first big leak.
7) Tenants vs Owners: Responsibilities and Documentation
If you rent, report leaks to your landlord/building management immediately and document everything. Structural waterproofing is usually an owner/landlord responsibility; interior contents often fall to the tenant or insurance. Keep photos, videos, and timestamps. If you own, keep a simple roof log: last inspection date, any patches, and warranty paperwork—this speeds diagnosis and avoids repeat costs.
8) After the Leak: Drying, Mold, and Odor Control
Stopping the water is step one; drying is step two. Wet gypsum and insulation can foster mold within 24–48 hours. We open controlled vents, run dehumidifiers, and treat affected areas with safe, approved products. If staining or musty odor persists, a limited mold remediation may be needed before repainting. Handling this promptly protects your family and prevents recurring smells.
Conclusion
Leaking roof repair doesn’t have to be confusing. Protect the area, stay safe around electrics, and tackle the actual cause—not just the stain. In the UAE, that usually means restoring drains, renewing details around penetrations, and repairing or upgrading the waterproofing in a way that can handle our heat and sudden rain. If you’d like a clear, no-pressure assessment and a practical plan that fits your budget, just click the contact button on the right-middle of this post. We fix the leak, dry the space, and help you prevent the next one.